
INSTALLATION GUIDE
I’m hoping this can provide some use to anyone who is looking to install on themselves or a friend… or maybe your hairstylist is wanting to help do this for you!
This is the general guideline I use when installing on every single one of my clients. I have been able to manipulate and alter this guide slightly in different ways to match anyone’s hair pattern and desired look!
Examples:
If someone wanted a perfect middle part you would still use this basic template but instead of brick-lay or overlap sectioning, you would section evenly to each side starting at the middle point.
Another example is if someone wants an ultra voluminous look you would make smaller sections in order to fit more. 4 sections might become 6 sections or a row of 10 DE might have 12 or 14 DE instead.
*Remember you may need more or less sections then is recommended or shown here. As a rule of thumb, try to keep your numbers even or odd depending if you are bricklaying or not*
Legend:
Pastel Rainbow = Regular Sectioning
Bold Rainbow = Sectioning for your Fringe to install or not = Optional.
Black Dots = Natural Part Lines.
These will help determine where your Locs will part and how they will sit.
Tips: Depending on the look you are going for will determine the amount of dreads you have and how each section is separated.
Example: if you want your Locs to style back easily, part the section of hair in the direction you want the Loc to sit.
Place them so they rest that way naturally as you braid.
1. Start from the bottom back and work your way up to the top.
2. Part each section so that the dread lays flat in the direction you would like it to sit while braiding.
3. The bottom rows should be larger with more hair per section. The top rows should be slightly smaller and more compact. This will reduce bulk at the neck and hair-line to allow for more coverage and volume on top.
4. Once you reach the top of your ears, arch the next section to curve the line upwards…Sort of like an orange slice.
Now you can work from ear to ear, over the top of the head.
5. The fringe area is Optional, you can part the desired amount out and leave it loose or follow the guidelines for installing dreads to achieve a full head look with no fringe.
6. Don’t be afraid to try things out for yourself!

Front View: Parting Line Guides For Fringe.
If you want your fringe to be installed, I suggest finding the thinner smaller Locs in your set to use of this. You can pack them in nice and tightly this way to ensure good scalp coverage. Whether you want Locs for bangs or not… This part line is EASILY changed to suit your needs! Just section off what you want and continue the patterns shown.

Back View. Brick Lay Patterning shown.
Take note the # of rows from nape to top of ears.
Between 3 and 5 is typical for average head sizes with normal hair density. You may need to add or take away a row depnding on your own head of hair.

Side View: Darker Band of Hair Marks the Parting Line for Fringe.
Use your desired parting and follow this as a guide.
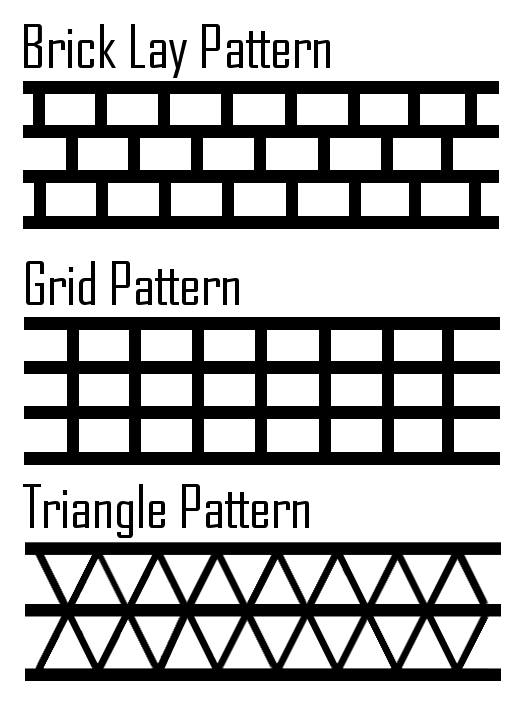
These are the 3 Standard sectioning Patterns.
You can use 1 or 2 or a mix of all 3 depending on what you feel works best for you!
Hope this helps, Thanks for reading!
